Search This Blog

Saturday, 17 July 2021

HOW TO ACTIVATE TPM 2.0 AND SECURE BOOT IN WINDOWS 10

How to activate TPM 2.0 and Secure Boot in Windows 10

Running your Windows 10 PC with TPM and Secure Boot active is a prerequisite for Windows 11. You can activate the security protocols now with a few settings changes.


While the most obvious changes coming with the release of Microsoft Windows 11 involve new graphics and an updated user interface, the more important changes and the driving force behind Microsoft's strategy, involve operating system security. Malware, particularly ransomware and the associated criminal activity, are a scourge to computer users everywhere and it must be stopped. Windows 11 will attempt to turn the tide with new hardware and virtualization-based security features.


However, it is noteworthy that many of the default features being deployed in Windows 11 are available as options in Windows 10. In some cases, getting these more advanced levels of security is just a matter of turning them on. In other cases, your PC's hardware may be too old to handle the new security requirements. In some cases, especially if your PC was purchased in the past few years, these advanced security settings may be installed and active in the background right now.


Activate TPM 2.0 and Secure Boot in Windows 10

Trusted Platform Module 2.0 (TPM 2.0) and Secure Boot have both been around for a few years and most new Windows 10 computers will be running the security protocols by default. The technology combines special motherboard hardware in the form of chipsets with cryptographic security protocols to prevent malware from running before the Windows 10 operating system starts to boot.


To see if your PC is operating under TPM 2.0 security protocols, right-click the Start Menu button on the Windows 10 desktop and select Device Manager from the context menu. Scroll down to the Security devices item in the list and expand it, as shown in Figure A.


Figure A

The example PC is new so, TPM 2.0 and Secure Boot is installed and active by default. There are two possibilities for an older computer that does not list the protocols in Device Manager: 1) TPM is turned off or 2) TPM is not supported.


Unfortunately, in a case where TPM 2.0 is not supported, there is little recourse. The only real solution is the purchase of a new computer, which is what Microsoft is trying to accomplish with the development of Windows 11. Older PCs are inherently less secure and need to be replaced if security is a priority—which it should be.


If TPM 2.0 is merely inactive, we can fix that by making some configuration changes. However, the first step is a little more complicated than typical.


Because TPM 2.0 and the Secure Boot protocols are hardware based and reside on the motherboard, the settings are buried deep in the Unified Extensible Firmware Interface BIOS menus. That means you will have to access UEFI before Windows 10 boots. Each motherboard has its own way of doing this and its own set of menus, so we cannot be specific about where the settings are located other than to suggest under a tab or section labeled "security."


Once the hardware is activated through the UEFI and Windows 10 has completed its boot process, open a command prompt (Windows Key + R) and type this command into the dialog box:


tpm.msc


This utility application, shown in Figure B, will allow you to activate TPM 2.0 and Secure Boot for your Windows 10 personal computer.


Figure B

To see the specific details regarding your implementation of TPM 2.0 and Secure Boot, you will have to navigate to the Security processor details screen, which is buried deep in Windows 10 Settings. Click the Start Menu, select the Settings item (Gear icon), and then select Update & Security. In the left-hand navigation bar, select Windows Security and then click Device security from the list in the right-hand screen. Finally, select the Security processor details link to reveal the screen shown in Figure C.


Figure C

From this screen you can see your chip specifications and check TPM version and status. There is a link to troubleshoot problems, but the only solution offered is to clear TPM back to factory settings.


Just like the upcoming Windows 11, TPM 2.0 and Secure Boot are now on by default for your Windows 10 personal computer. Your PC is now more secure than it was before. The ability to run your PC with TPM active is also one of the major specifications of Windows 11. If your PC cannot run TPM in Windows 10, Microsoft will not update your computer to Windows 11—at least not automatically.


Cheers!!!


Edited By AdeDanCompTech

WINDOWS 11 NEW FEATURES AND HOW TO USE THEM

Windows 11 new features and how to use them

With Windows 11 Insider Preview released and the stable version on its way, there is a fresh new design and a bunch of new features aimed at streamlining your PC and helping you be more productive, whether you're using your laptop or tablet at home or in the office. 


Here are the best new Windows 11 features we've seen announced so far, and how you'll use them, based on what Microsoft has demonstrated. We'll update this post with more thorough instructions once the beta version comes out next week and we can try them ourselves.


How to use the new Windows 11 features

* Android apps

You'll be able to download Android apps on Windows 11.

What it is: Android apps will be built into Windows 11 natively through the new Microsoft Store -- a change Windows users have been waiting on for years. Though you could access Android apps on your Windows 10 PC in certain cases (like if you have a Samsung Galaxy phone), Windows 11 marks the first time everyone will be able to download them directly onto your PC. 


How you'll use it: Android apps will be in the new Microsoft Store via Amazon's Appstore. That means you'll need to download the Amazon Appstore to access the nearly 500,000 apps available there, including Disney Plus, TikTok, Netflix, Pinterest, Uber and more. However, you won't be able to access every Android app found in the Google Play Store.

To get started, you'll need to download the Amazon Appstore and sign into or create an Amazon account. Then you'll be able to search for free or paid apps as you would on any other platform. Android apps will be integrated into the Start bar and will also appear on the Taskbar with their own windows.

* Widgets

Widgets on Windows 11 will give you customizable, at-a-glance information.

What it is: Windows 11 will add Widgets to the interface -- an AI-powered customizable feed that slides out to show you info such as news, weather, a glimpse at your calendar and to-do list and your recent photos. Widgets are similar to a feature called news and interests found in a recent Windows 10 update. 

How you'll use it: On the newly redesigned taskbar, you'll find a button for Widgets. When you click or tap it, a panel will slide out from the left side of your screen with a series of widgets that give you the at-a-glance information you're looking for. You can also expand it to be full screen.

* Microsoft Teams

Bring up the Microsoft Teams Chat bar directly from the taskbar in Windows 11 for easier access to your contacts.

What it is: Windows 11 will build Microsoft's video chat platform Teams directly into the operating system, making it easier to access for daily use. You can connect with others on Teams across Windows, Android, Mac or iOS. 

How you'll use it: Teams will now appear in the taskbar. Click the Teams icon to launch a Chat tool, letting you choose if you want to message, text, voice or video call one of your contacts. Click Meet or Chat, and choose who you want to contact. Or, open the full version of Microsoft teams by clicking the box at the bottom of the Chat screen.

* Desktops

Easily toggle between different desktops in Windows 11.

What it is: Windows 11 will let you more easily create separate virtual desktops for each part of your life, and customize them with different wallpapers, so you can create a desktop for personal use, work, school, gaming or anything else, and easily toggle between them. This is similar to the Mac OS virtual desktop feature. 

How you'll use it: We don't have as much information on how to set up the new desktops yet, but from Microsoft's demo, it looks like once you do, you'll be able to scroll to the bottom of your screen and see a window slide up with the different desktops you've created, letting you switch back and forth between them with one click.

* Snap Layouts

What it is: When you're working in a bunch of open windows, Windows 11 will let you arrange them in different layouts on the screen, and will save all of those windows in that arrangement. 

How you'll use it: When you open a window, you'll see a button that looks like a square in the top right corner, in between the X and the minimize button. Click that to see different layout options for that window, and select the layout and the position within the layout that you want to place that window.


* Snap Groups 

Bring together groups of apps and windows with Snap Layouts, and easily maximize and minimize the entire bunch with Snap Groups in Windows 11.

What it is: Snap Groups are the set of open windows that you saved in Snap Layouts, found in the taskbar for easy access to call up once again, so you can minimize or maximize them as a group.

How you'll use it: Hover over your browser in the taskbar (it's unclear if you need to be using Microsoft Edge to do so, as Microsoft did in its demo). You'll see the different groups of sites and apps you created pop up. Click the one you want to open the whole group again. 


Cheers!!!

Edited By AdeDanCompTech


Monday, 12 July 2021

WINDOWS 11: WHAT IS EXPECTED

Windows 11: What is expected

Windows 11 Insider Preview has been released while the stable version is coming soon. These are all of the new features and other details about Microsoft's big update you need to know.


Windows 11 brings a new look and new features to Microsoft's operating system.


Windows 11 Stable Version is on its way. Microsoft unveiled "the next generation of Windows" at its virtual event in June, and with it, some big changes to the long-standing operating system, including its first name change in six years. The announcement follows Microsoft's roll out the latest version of Windows 10, the Windows 10 May 2021 update (also known as version 21H1). 


Windows 11: Top new features in 2021

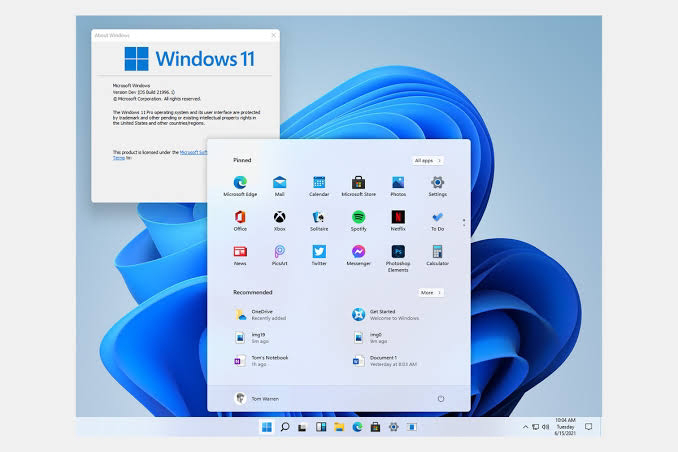
Windows 11 includes a slew of new features, like the ability to download and run Android apps on your Windows PC and updates to Microsoft Teamsthe Start menu and the overall look of the software, which is more clean and Mac-like in design.


Seven new features included in Windows 11

Here are a few of the standout new features in Windows 11:

* A new, more Mac-like interface. Windows 11 features a clean design with rounded corners, pastel shades and a centered Start menu and Taskbar. 

* Integrated Android apps. Android apps will be coming to Windows 11 and installable from within the new Microsoft Store via the Amazon Appstore. (There were a couple of ways to access Android apps on Windows 10, including if you had a Samsung Galaxy phone, but this will make it native.) 

* Widgets. While they've been around for a while (remember desktop gadgets on Windows Vista?), including in a recent Windows 10 update, you can now access widgets directly from the Taskbar and personalize them to see whatever you'd like. 

* Microsoft Teams integration. Teams is getting a face-lift and will be integrated directly into the Windows 11 Taskbar, making it easier to access (and a bit more like Apple's FaceTime). You'll be able to access Teams from Windows, Mac, Android or iOS. 

* Xbox tech for better gaming. Windows 11 will get certain features found in Xbox consoles, like Auto HDR and Direct Storage, to improve gaming on your Windows PC. 

* Better virtual desktop support. Windows 11 will let you set up virtual desktops in a way that's more similar to Mac OS, toggling between multiple desktops for personal, work, school or gaming use. 
* Easier transition from monitor to laptop, and better multitasking. The new OS includes features called Snap Groups and Snap Layouts -- collections of the apps you're using at once that sit in the Taskbar, and can come up or be minimized at the same time for easier task switching. They also let you plug and unplug from a monitor more easily without losing where your open windows are located. 

When you'll be able to get Windows 11

Windows 11 is now available as an Insider Preview build download for those in the Windows Insider Program, and will be available as a public beta this July. It will begin rolling out to all compatible PCs and new PCs around the 2021 holiday season, according to Microsoft, and will continue rolling out into 2022. However, several hints suggest that Windows 11 could arrive as early as October

How to know if your computer will be compatible with Windows 11

To see if your current Windows 10 PC is eligible for the free upgrade to Windows 11, go to Microsoft's website for a list of requirements. 

Originally, Microsoft was directing people to download the PC Health Check app to check if their machines were compatible. However, many users reported that it did not give adequate amounts of detail as to why a device was not compatible. On June 28, a Microsoft blog post said the company was "temporarily removing the app" to address this issue, and that the tool would return before the fall Windows 11 release.

New PCs will be eligible for an upgrade to Windows 11.

If you buy a new PC between now and the general release, that computer will also be eligible for the free upgrade.

How to download Windows 11 once it's available

Once Windows 11 becomes generally available, you'll download it the same way you would any new version of Windows. Most users will go to Settings > Update & Security > Windows Update and click Check for Updates. If available, you'll see Feature update to Windows 11. Click Download and install.

Will it be free to download Windows 11?

If you're already a Windows 10 user, Windows 11 will appear as a free upgrade for your machine.


Cheers!!!

Edited by AdeDanCompTech


Also See:    Windows 11 New Features and How to Use Them

                   Will My PC Work With Windows 11?

WILL YOUR PC WORK WITH WINDOWS 11?

Will your PC work with Windows 11?

Check out Microsoft's system requirements.

Microsoft has a tool to help you figure out if your device will be able to run Windows 11, but it's temporarily offline.


Here's how to check another way.

A vast majority of PCs should be compatible with the new Windows 11 operating system, according to a Windows blog post published after the announcement of Microsoft's first major software upgrade in six years. But if you're planning to upgrade your current PC instead of buying a new device, we recommend you make sure the updated OS will work on your computer. Otherwise, you'll probably need to replace your PC by 2025 as Microsoft phases out Windows 10 over the next several years.


When Microsoft first directed Windows users to download its PC Health Check app to test whether your PC meets the system requirements for Windows 11, many people reported that it was not giving enough detail as to why their device was not compatible. The company temporarily removed the tool and said in a blog post that it plans to address the feedback and get it back online sometime before Windows 11 becomes generally available in the fall. 


You can still figure out if your device will run Windows 11 a few other ways, though. Here's what to do. 


What's WhyNotWin11?

A new, open-source app called WhyNotWin11 could be a good alternative to the PC Health Check app, especially while Microsoft's official tool is offline. The Github app, created by a developer not affiliated with Microsoft, is a less friendly interface, but it should give you more information and go into more detail about various potential compatibility issues. 


Will my laptop run Windows 11?

To determine if your current PC will be able to run Windows 11, you can check out this list of system specifications on Microsoft's website, or in the chart below. If your machine is compatible, you can download the Windows 11 update for free when it becomes available around the 2021 holiday season. If you're part of the Windows Insider Program, you can download the Insider Preview build version now.


What are the system requirements to run Windows 11?

Here's the full list of system requirements for Windows 11, including at least 4 gigabytes of RAM, 64GB of storage and a 720p display larger than 9 inches diagonally.


Windows 11 Requirements

Spec

Requirement

Processor

1GHz or faster with 2 or more cores on a compatible 64-bit processor or system on a chip

RAM

4GB

Storage

64GB or larger storage device

System firmware

UEFI, Secure Boot capable

TPM

Trusted Platform Module (TPM) version 2.0

Graphics card

Compatible with DirectX 12 or later with WDDM 2.0 driver

Display

HD (720p) display greater than 9 inches diagonally, 8 bits per color channel

Internet connection and Microsoft account

For Windows 11 Home edition: internet connectivity; Microsoft account to complete device setup on first use For all Windows 11 editions: internet access to perform updates and to download and use some features; Microsoft account for some features


Cheers!!!

Edited By AdeDanCompTech

HOW TO GET WINDOWS 10'S FILE EXPLORER IN WINDOWS 11

How to Get Windows 10's File Explorer in Windows 11

The Windows 11 File Explorer has no ribbon and worse context menus.

There's a lot to like about Windows 11, but for many people the new design of File Explorer is a letdown. It has a similar layout to Windows 10's File Explorer and an identical layout and functionality, but there's no ribbon menu and many of the common menu items such as "view extensions" are buried in the options submenu. 


Even worse, the buttons for basic functions such as cut, paste and rename are only icons, with no tool tips or text on them to tell you what they do (presumably this is a bug). The jump lists you get when you right click on a folder may have fewer options too.

Fortunately, there's an easy way to get the old Windows 10 File Explorer back, complete with its ribbon and jump menus. You just need to edit the registry.


How to Restore the Windows 10 File Explorer to Windows 11

1.   Open Regedit. You can do this in Windows 11 by hitting Windows + R and entering regedit in the Run box or you can search for regedit using the Search feature. Click Yes if asked for permission by User Account Control.

2.   Navigate to HKEY_CURRENT_USER\Software\Microsoft\Windows\CurrentVersion\Explorer\Advanced

3.    Right click in the right window pane and select New->DWORD (32-bit) Value. A new entry appears with the name "New Value #" and a number.

4.    Rename your value to Separate Process. It must be spelled exactly this way.

5.    Open Separate Process by double clicking it and change the value to 1. Click Ok.

6.    Close Regedit and restart your PC.


Your computer should now show the classic Windows 10 File Explorer, though some of the icon designs may be a bit different. For example, the library folders in Windows 11 are in different colors, not just yellow. Overall, though, you're getting back the user experience and functionality you lost.


If you want to go back to Windows 11's File Explorer, just change the Separate Process value to 0 or erase the Separate Process key


Cheers!!!

Edited by AdeDanCompTech

HOW TO RESET YOUR CHROMEBOOK SO IT RUNS LIKE NEW

How to reset your Chromebook so it runs like new

Easily give your Chromebook a fresh, clean start in under a minute.

Resetting a Chromebook is a snap.

One of my favorite Chromebook features is how fast and easy it is to perform a factory reset. That might seem odd, but it’s a simple way to keep it running smoothly. Google calls the feature Powerwash and it can be done in under a minute. It’s also one of the features that make Chromebooks so good for sharing. Just Powerwash your Chromebook and someone else can use it and you won’t need to worry about them accessing your info.

Also, although Chromebooks are inherently secure, that doesn’t mean you can’t install a malfunctioning extension or a web app that misbehaves. Uninstalling the offending extension or app can typically fix the problem, but if that doesn’t work, a reset should do the trick. The same goes for other wonky behavior you may experience.

A Powerwash is a breeze to do, too. I’ve detailed the steps below. Also, while I included how to locate most settings by navigating menus, it is generally easier to use the built-in Launcher search feature to find exactly what you’re looking for fast. The Launcher can be opened by clicking the radial button at the far left on the shelf at the bottom of your screen; a two-finger swipe up from the shelf; or hitting the Search key.

Back up your files first

Since you’ll be wiping your Chromebook’s internal storage, you’ll want to back up any files you want to keep to the cloud or an external drive. This isn’t as painful as you might think because a lot of what you do on a Chromebook is already synced to your Google account – from apps and extensions to passwords and Wi-Fi networks. (To see what’s set up to sync, go to the Accounts section of the Settings menu. Click on Sync and Google services and select Manage what you sync.)

Back up files from your Files folder before you Powerwash your Chromebook.

What doesn’t automatically get synced are files saved locally to the Downloads folder. Linux and Play files are also stored locally. To see and back up those and any other files, open the Files app (or search for Files with the Launcher). The left-side navigation panel in Files shows you all your folders.

You’ll also see your Google Drive folder (that’s what I use for backups) as well as external storage. If your Chromebook has a microSD card slot, for example, you can save files to a card or attach an external drive. You can copy and paste files to Google Drive or external storage or just drag and drop them. The Powerwash only deletes what’s on your Chromebook’s built-in storage.

Give it a good scrub

A couple of clicks from a clean Chromebook.

Once your files are all backed up, you can start the Powerwash. Go to the Settings menu by clicking on the time on the far right side of the shelf at the bottom of your screen. That will pop up the quick settings panel. Click on the cog icon at the top of the panel.

Under the Advanced section at the bottom of the menu (you may need to click on Advanced to expand the options) you’ll find Reset settings and Powerwash. Click the Reset button and you’re on your way. You can also search for Powerwash with the Launcher or Search key to access it. And, if you aren’t or can’t sign in and want to Powerwash a Chromebook, press and hold Ctrl plus Alt plus Shift plus r to begin the reset.

There are a couple of warnings you’ll need to click through to confirm that you know what you’re about to do. After that, the Powerwash begins. And it is fast, too, generally taking less than a minute to complete. Also, if Chrome OS isn’t up to date or there’s a firmware update available for your Chromebook, it will ask if you want to install the updates.

Sign in and start working

When the Powerwash cycle completes, the Chromebook will restart and you’ll be greeted with the Welcome screen. Just follow the prompts to sign in to your Google account and you’re done. Anything you have set to sync will do so. That includes installing web and Android apps and browser extensions and any updates. Otherwise, the internal drive should be clean and your Chromebook running like new.


Cheers!!!

Edited by AdeDanCompTech

You need to enable Secure Boot to install Windows 11 — here’s how.

You need to enable Secure Boot to install Windows 11 — here’s how. Windows 11 requires Secure Boot to run, and here are the steps to che...